Remote Python Web Scraping on a Grad Student Budget
In the summer of 2021, I taught our department’s annual short course on Python. I enjoyed teaching this class, and there are a lot of good lectures, but my favorite is the day we spend on web scraping—a skill that has a democratizing power. When you know how to scrape, the world opens up. You don’t need a team of research assistants or co-authors to create big data sources. You don’t need to limit your research to data from a few specific cases that are feasible to manually collect.
But scraping is not without its attendant hassles. Collecting a lot of data takes a long time, time in which you need your computer powered on and connected to the internet. You can sidestep some of these problems by uploading your code to a remote cluster, but in my grad student experience, doing so is costly and often infeasible. For me, this has generally meant scraping only on days I won’t be traveling back and forth to campus and only during the day (so I can let my computer sleep at night).
As you can imagine, this workflow is incredibly slow and tedious. I figured there had to be a better way. Enter Google Cloud Platform (this post is in no way sponsored, I just like the product). This platform has a ton of tools (most of which I do not understand in the slightest), but for our purposes, Google Cloud Platform allows anyone to create a virtual machine that is always on, always online, scalable, and generally very very cheap. Grad student cheap. YMMV, but I have scraped for two weeks straight for less than 50 cents.1 If this is your first time creating an account, you also get a \$300 credit for three months.
I did not know about this resource when I taught the course in 2021, but in the part of the multiverse where I did know about Google Cloud, here is what I shared with my students:
Prerequisites: I am assuming you know how to use Python for scraping and have a very basic understanding of bash and the command line. If you need some help with the command line, there is of course stackoverflow or this helpful free book.
Getting started with Google Cloud Platform
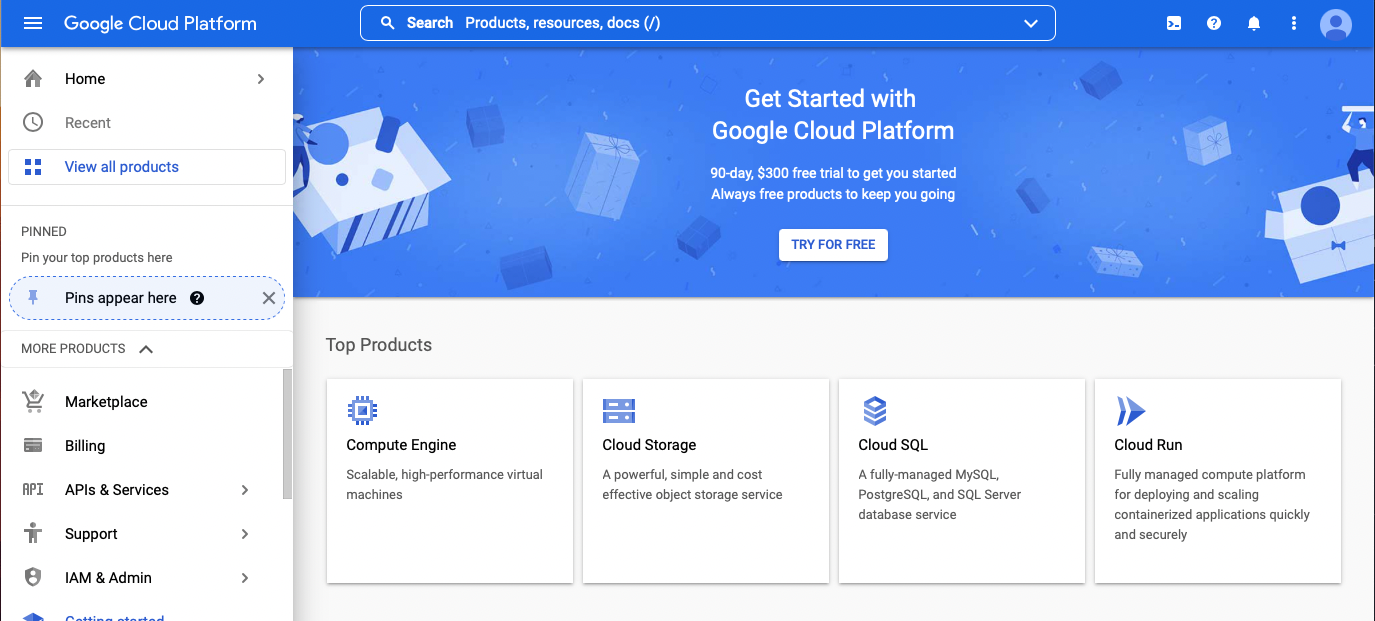
To get started, you’ll need to create a Google Cloud account. Go to https://cloud.google.com, click “Get started for free”, and use your Google account (or create a new one) to sign up. You will need a credit card to complete this process, but if this is your first time signing up for Google Cloud, you’ll get a free \$300 credit to use in your first three months.
Once you complete the sign up process, you’ll be taken back to the main page. Click “console” in the upper right to go to the main dashboard. Accept the terms of service.
Start Your Free Trial
To get started, we’re going to activate our free trial, which gives you \$300 to use for 90 days.
On the blue welcome banner, click “TRY FOR FREE.”2
As foreshadowed, you’ll need to go through a quick, three-step process and enter your credit card information. Per Google, you shouldn’t be charged until either you run out of the \$300 credit or 90 days elapses, whichever comes first.
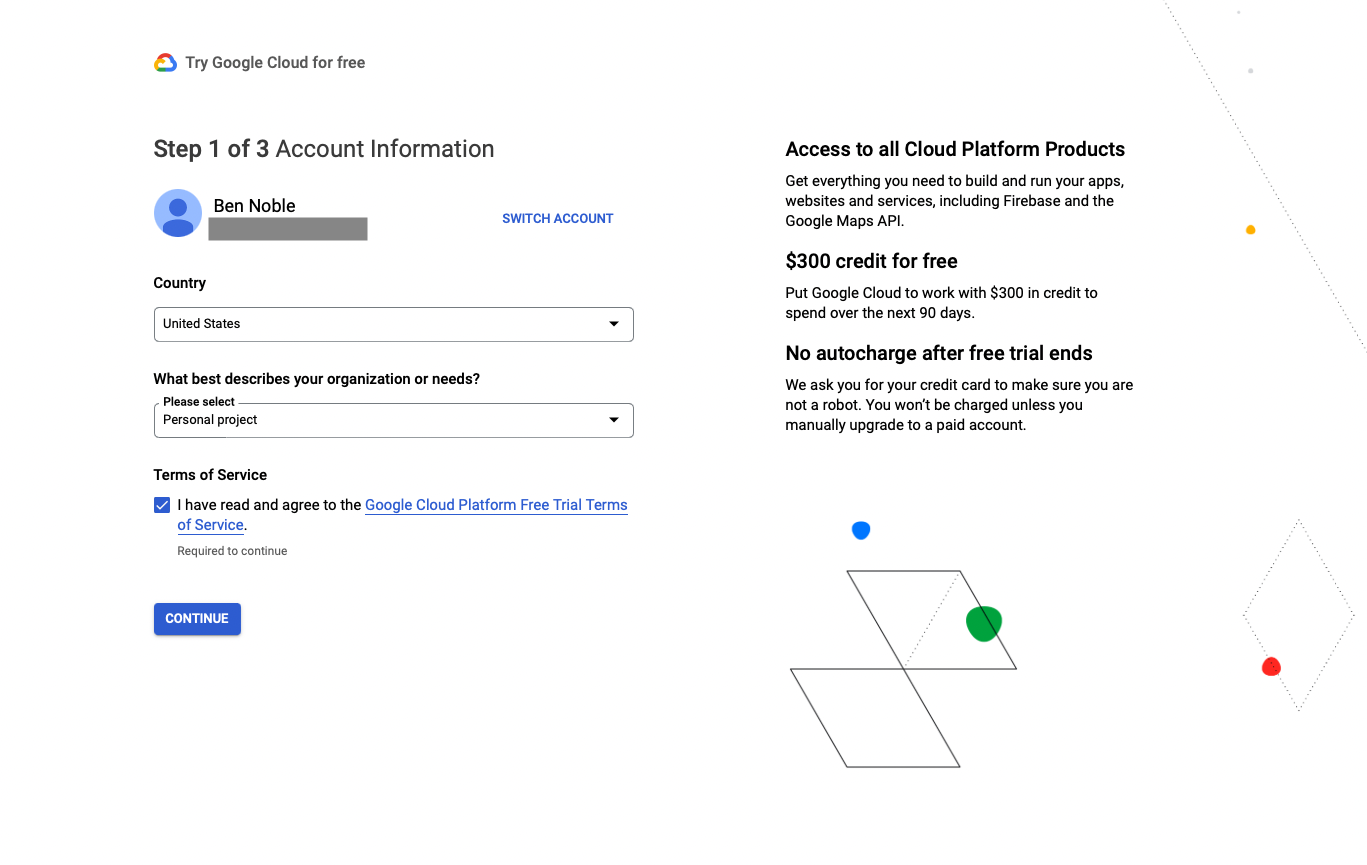
Enter your country, “personal project” for your organization, and accept the terms of service. On step 2, confirm your phone number. Finally, on step 3, change the account type to “Individual” and enter your credit card information.
Enabling API and creating a project
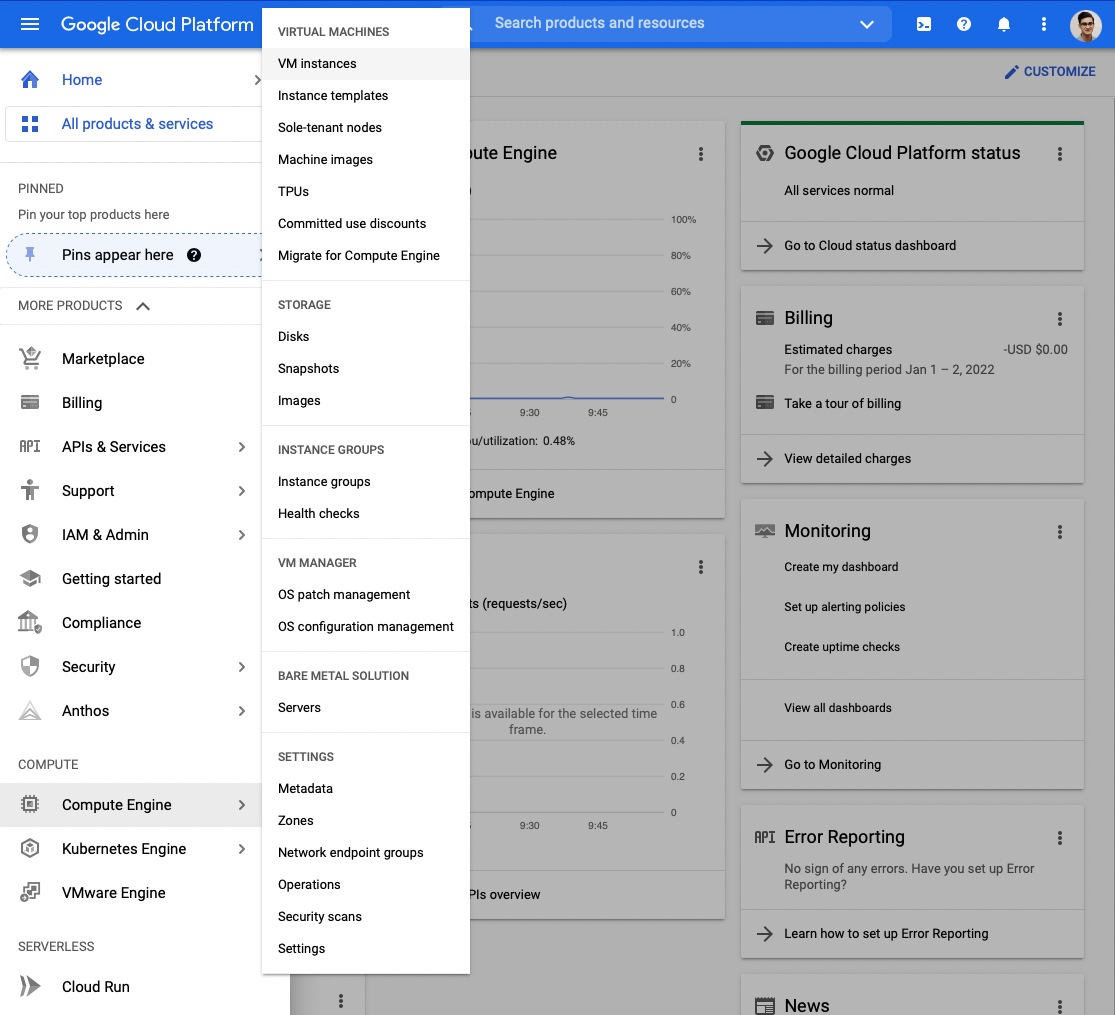
Now, you’re ready to get started. Click on the three bars in the upper right, and navigate to “Compute Engine” > “VM Instances”.
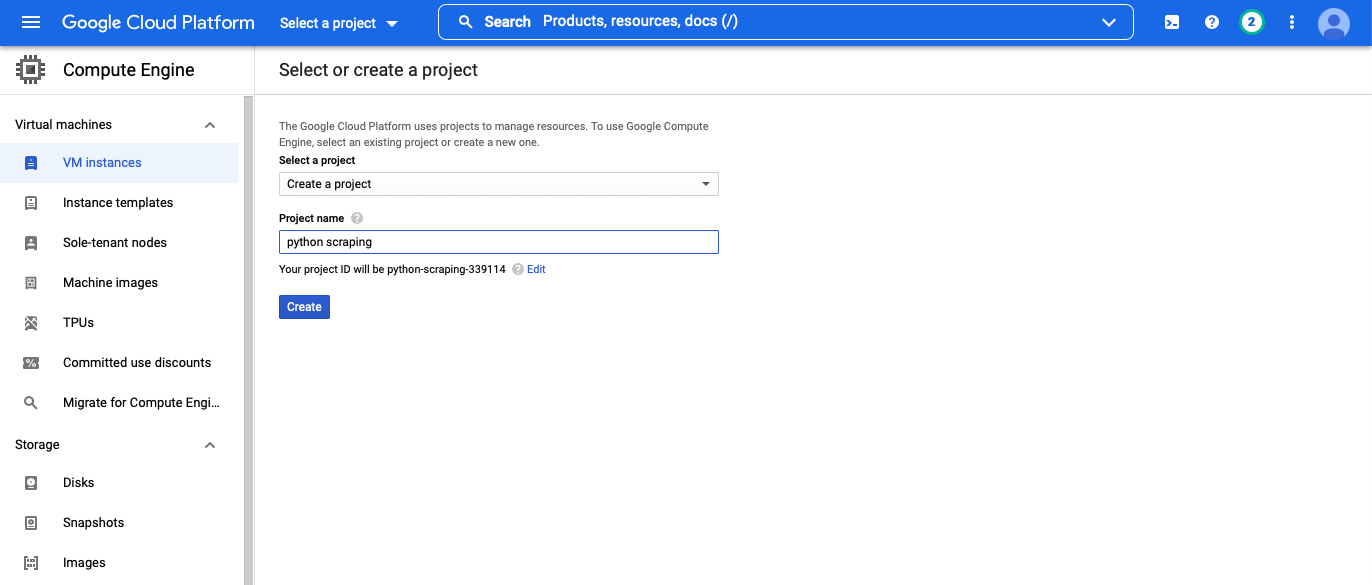
You may be asked to create a project at this point. You’ll need to make up a name for your project (like python scraping), but it can be anything—this is basically just a folder.
Now, you should automatically be taken the Compute Engine API page. You’ll need to click the blue “ENABLE” button.
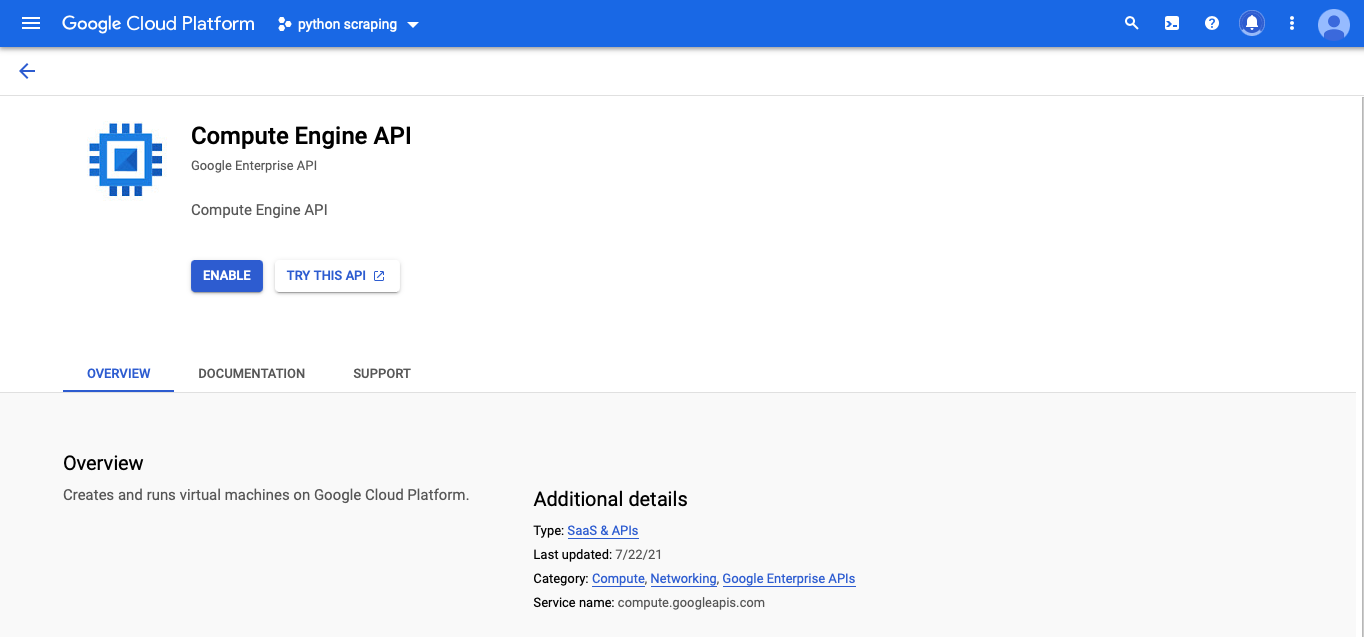
Once the API is enabled, you should be taken the VM instances page.3

Create a virtual machine
With all that out of the way, it’s finally time to create your remote machine.
A brief sidebar on pricing: While you’re in the free trial, the costs you incur should be deducted from your \$300 credit. After the 90 day trial ends or you use your credit, Google has something called the “free tier,” which you can learn about here. However, the pricing structure is a little opaque and it’s not entirely clear to me what is and isn’t included. It’s actually not 100% free. Below, I am going to describe how I normally create my scraping machine, which again, is not 100% free, but it has never cost me more than a \$1 for a week-long scraping project. If someone understands the pricing structure better than I do, get in touch with me via email or Twitter and I can update this post.
Click on the “Create Instance” button in the middle of the page and:
- Give your instance a name (this can be anything you want)
- Choose a region (I believe there are discounts for selecting Oregon:
us-west1, Iowa:us-central1, or South Carolina:us-east1) - Under machine configuration, leave the series as E2. For machine type, select e2-micro.4
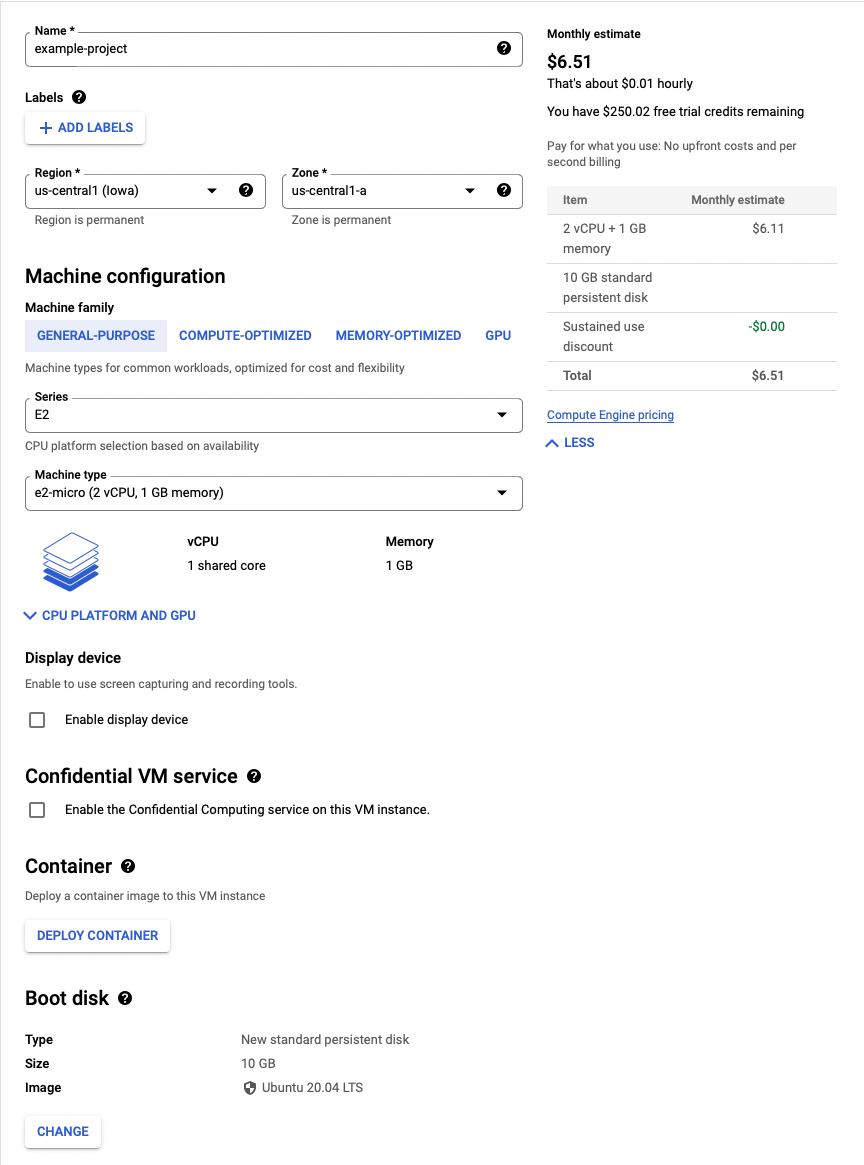
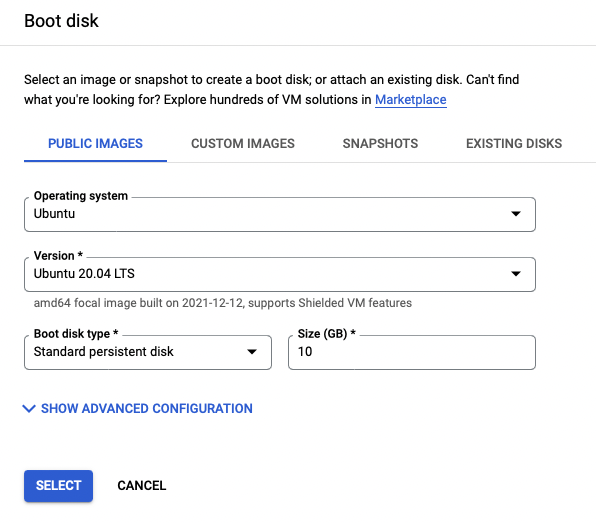
- Under Boot disk, click change. The important thing to change is the boot disk type. The default is balanced persistent disk (which is not free), but you will want to select standard persistent disk (which I believe is free). I believe you can also get up to 30GB for free, but 10GB has always been sufficient for me. For the operating system, stick with the default—Debian: Debian GNU/Linux 10 (Buster).
- Click create and your machine will be created.
Getting your machine up and running
To access the machine, click the SSH button. This will launch a pop up window asking if you want to connect, which of course, you do. So click connect. This will take you to a command line where you can start interacting with your machine.
Python should be installed by default, but to verify, type python3 -V. You should see something like Python 3.8.10. However, pip will not be installed. Do that with:
sudo apt-get install python3-pip
At this point, you can install any modules you’ll need for your scraping script (like bs4) the usual way.
You could run your your script now, however, by default, if you close the command line window, your script will terminate. That is not what we want! To fix that, you’ll need install tmux, which allows you to open multiple sessions that run even when the browser is closed. Install tmux with
sudo apt-get install tmux
Running your script
To run your script, you’ll need to launch a tmux session with the command tmux. This will take you to a new, blank command line. This tmux session will continue running even if you close the browser or turn off your computer or disconnect from the internet.
There are a few ways you can get your script from your computer onto the cloud, but an easy method is to type nano <scriptname>.py on the command line, which will create a new file. You can paste an existing script here from your local machine. To save it, use ^ x. Then, y to save. Then enter to overwrite.
Now, you’re ready to go. Simply type python3 <scriptname>.py to run your script.
You can close the browser window, forget about your script, and go to the bar or whatever. It will ask if you’re sure you want to close the window (and it might scare you), but if you set up the tmux session properly, your session will continue to run on Google’s side.
Some useful things to know while your script is running
Checking on your script
When you want to check on your script, you’ll log back into your Google Cloud account, navigate to the virtual machine section, and click SSH as we did when we started. However, launching the terminal will take you back to the main window (not the tmux session where your script is running). To get back to the tmux session, use tmux ls to print a list of all the sessions. Yours will most like be “0: …”.
To access the session, type tmux a -t0 (where the 0 is the prefix from tmux ls). Or, if you happen to have a different session open, replace 0 with that specific session number.
Backing out of an active tmux session
If you want to return to the main session, you can use ^ b followed immediately by d. From here, you can open another tmux session and run other scripts if you have sufficient memory and CPU power.
Checking resource usage
If you want to see your resource usage (which could be helpful if you’re going to run other scripts or you want to know how much memory and storage your current script requires), you’ll need to install inxi using
sudo apt-get install inxi
Once installed, you can use inxi -F, which will print out your resource usage.
A note about the pandas module
For some reason, I’ve had issues using pip to install pandas. If that happens to you,
sudo apt-get install python3-pandas
should fix it.
What is this costing me?
If you want to see how much you’re spending, back on the Google Platform webpage, use the sidebar menu to navigate to billing. That will give you an overview of your costs. However, if you’re using the free \$300 credit, it will show your total cost on the top left as \$0.00 and then under in small type “includes -\$x.xx in credits.”
Downloading the file when your script is done
Assuming your scraper wrote everything to a csv, this part is super easy. You can download the file by clicking the gear in the upper right and clicking download. Enter the file path (which will just be <filename>.csv if you didn’t create additional directories). Depending on this size, this might take a little while, and you will need to keep the browser window open and ensure you stay connected to the internet while it’s downloading.
If your file ends up being too large (you’ll know because the window will crash), you can also try a few things. One option is to compress the file with the zip command. You can install zip with:
sudo apt install zip
and then zip the file with the following syntax: zip outputname.zip inputname.zip and then trying downloading that file (see more here).
Another option is to try splitting the file into pieces first. A linux command called split can help you do that. Here’s an example: split -b 1G filename.zip filename.csv. To break that down, split calls the command, -b stands for bytes I believe, 1G is telling linux to break the file into 1 GB chunks (but you can easily change the size). Then you need to name the output as a zip file and call the original file you’re trying to split. You should then be able to download the resuling zipfile (see more here).
Stopping or Deleting the instance
If you’re done with the VM and aren’t about to start a new scraping project, you should delete it (otherwise, Google will continue to charge you for storage—even if it is “stopped”—I believe). On the row that lists your instance, click the vertical three dots > delete.
If you are just taking a short pause and are about to start a new scraping project, then you can “stop” the machine by clicking the three vertical dots > stop.
And with that, you should have everything you need to scrape remotely on the cheap. Have fun.
Sources
There were many tutorials and stack overflow pages that helped me along the way. While I regret that I did not keep track of every single one, I want to cite a few sources here that were particularly helpful as I was getting started:
The Google pricing structure is a little opaque. While I have generally done all my scraping for pennies on the dollar, please don’t take anything I say here regarding cost as a guarantee or promise of what you’ll spend. Something might change between me writing this post and you following the directions, or your system settings/region, etc may vary. ↩
If this doesn’t appear (or if you lose it), you should be able to start the free trial by clicking “Activate” on the gray free trial bar above the window. ↩
If that doesn’t happen, open the sidebar menu, find Compute > Compute Engine > VM Instances. ↩
As you’ll see, you can create some really powerful machines. For a simple scraper, an e2-micro is sufficient and there are some discounts for selecting this machine. ↩